For those individuals who have purchased a new Dell Inspiron may find themselves in a world of frustration after a brand-new laptop begins to have trackpad issues almost right out of the box or after a few days/ weeks of use. I am hoping to address what I think the issue is and how I fixed it on my device.
What Is The Issue
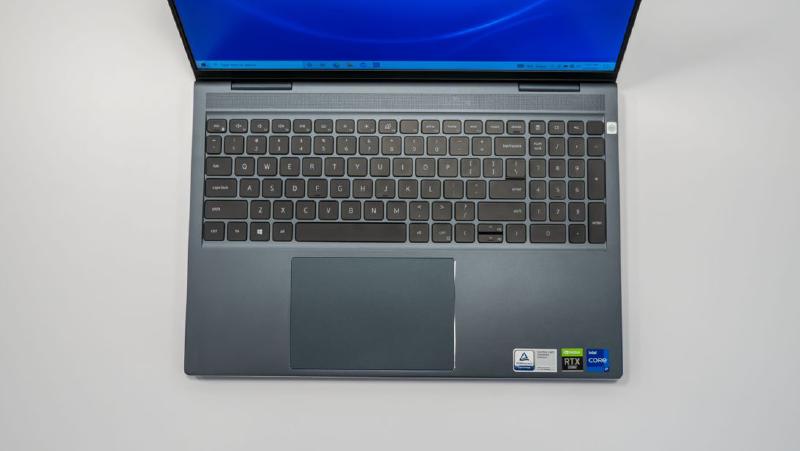
Upon using the laptop, everything seems to operate normally but after a while the track pad will stop tracking movements and clicks accurately. An instinct is to restart the device but to no avail this does not fix the issue. Looking at the Dell forum, there is over 18 pages worth of discussion (which is daunting) and none of them seem to help my device, but your milage may vary.
My Theorises
Initially using the device, the trackpad works flawlessly. The trackpad only begins to have issues after the device has been on for a while and has warmed up (this is key). Restarting/ shutting down the device also does not fix the issue but turning it off or putting it to sleep for a while does fix the issue… This suggests that this is not a software/ driver issue but a manufacturing issue.
The way the hardware is laid out, the trackpad is placed directly on top of the battery. As you begin to use the device the battery begins to warm up and expand. This results in the battery to press up against the trackpad which would result in inconsistences in tracking. This also makes sense why restarting the device does not fix the issue as the battery does not cool down enough to stop pressing against the trackpad.
This is further supported when the trackpad can be replaced, and the issue continues.
So how do you fix this from happening?
Solution
The following will show how to fix the issue by disassembling your device. Only proceed if you are comfortable doing so and in line with your warranty. I am not responsible for any damage you do to your device!
Prepare the device
Ensure your device is switched off and is unplugged from any power outlets. You may want to enter service mode Which disconnects the battery from the device by holding B and pressing the power button for 3 seconds. This is not strictly necessary as the battery will be disconnected later. I would also strongly suggest using any ESD protection if available to avoid any static that could harm your device.
Remove the cover
Remove the 8 screws found on the bottom of the device. Note the top two screws in the red circle are captive screws and they will not come out fully as they are attached to the chassis body.
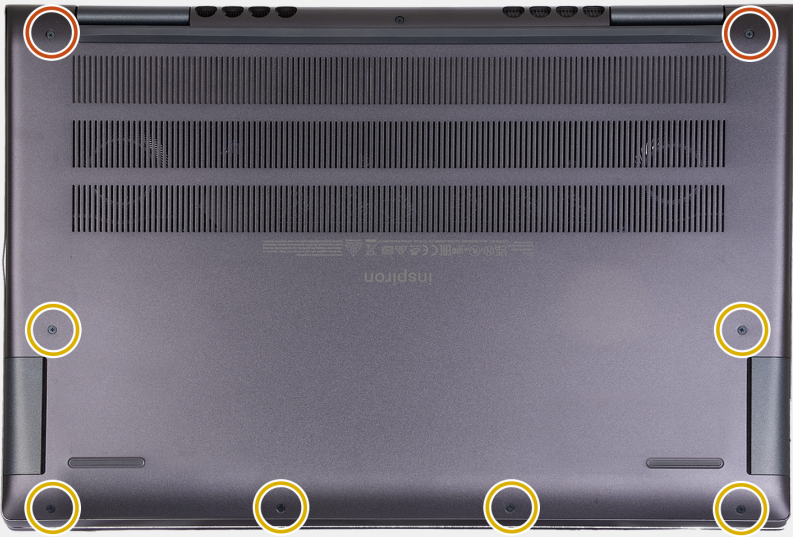
Using a plastic scribe, begin at the top left corner to pry the cover off and work around the device till it comes off.
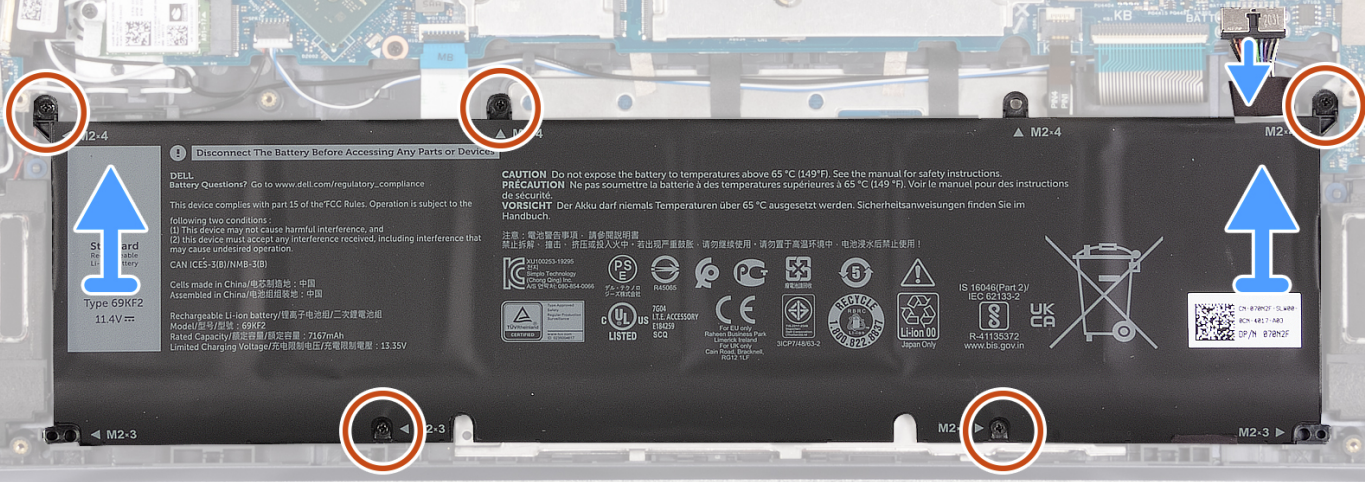
Remove The Battery
Next unplug the ribbon cable situated in the top right corner of the battery. Pull the connector towards you to disconnect it. Then unscrew the 5 screws holding the battery in. Carefully remove the battery and you should now see the touchpad underneath.
Adjust The Track Pad
Finally, I would suggest unscrewing the trackpad and pop it out briefly to make sure it is seated correctly in the chassis.
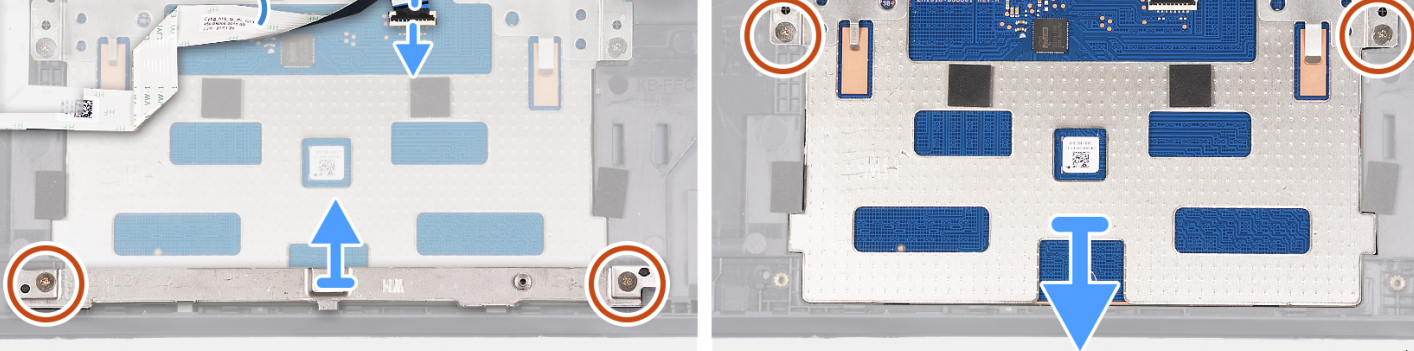
At this stage with the trackpad slightly out of the chassis, I still had the battery connected and the device powered on. I did this and confirmed my theory about it being a hardware issue. When out of the chassis, the trackpad work just fine even when just having issues prior taking the device apart!
Reassembly
Now reinstall the trackpad and the 4 screws that hold it in place. Make sure not to over tighten the screws! ~ Just a little resistance is required. Next install the battery. Now you need to experiment with the tightness of the battery bolts. I began by just lightly screwing them in, however I still had issues. I took the battery back out and tightened them further which worked for me. It’s important that you equally tighten all the screws to avoid stress on the battery. Finally, reinstall the cover and connect the devices charger which will disable service mode automatically.
Conclusion
I am surprised that Dell has not figured this issue out and implemented better measures in manufacturing and quality control. It’s a shame to see that so many people are having the same issue and requesting refunds, replacements, or fixes for a device which is otherwise perfectly functional. Using the method described above, I have not had any issues for the best part of 4 months (December 2021) and still going strong, so chances are you may be experiencing the same issue which can be easily fixed!