
Introduction
Yes, you read that correctly! In this post, we’ll guide you through the process of creating a website entirely for free using Hugo and Github. Specifically, we’ll delve into the setup of the very site you’re currently exploring. This step-by-step guide is designed for individuals with limited coding experience or understanding. Despite its technical nature, most of the process is self-explanatory and is relatively straightforward once you’ve completed the initial setup.
Prerequities: Setting Up Your Toolbox
Before diving into the website creation process, ensure you have the following tools at your disposal:
- GitHub Account: This will serve as the repository for your code and the hosting platform for your website.
- Hugo: A crucial tool that enables you to build the website and preview it locally before making it publicly accessible.
- Git: Essential for “pushing” your code to GitHub, making version control seamless.
- Preferred Text Editor: Since all tweaking and post creation involve working with text files, choose a text editor that suits your preferences. I recommend Sublime Text for its user-friendly interface and powerful features.
While I’ll be using Ubuntu, the commands provided can be adapted to any operating system.
Setting Up Your GitHub Repositories
Begin by navigating to GitHub and either signing in or creating a new account. Keep in mind that your GitHub username will be the name of your website. If your current username doesn’t align with your desired website name, consider creating a new account with the preferred username. For instance, my site link is https://59cyber.github.io.
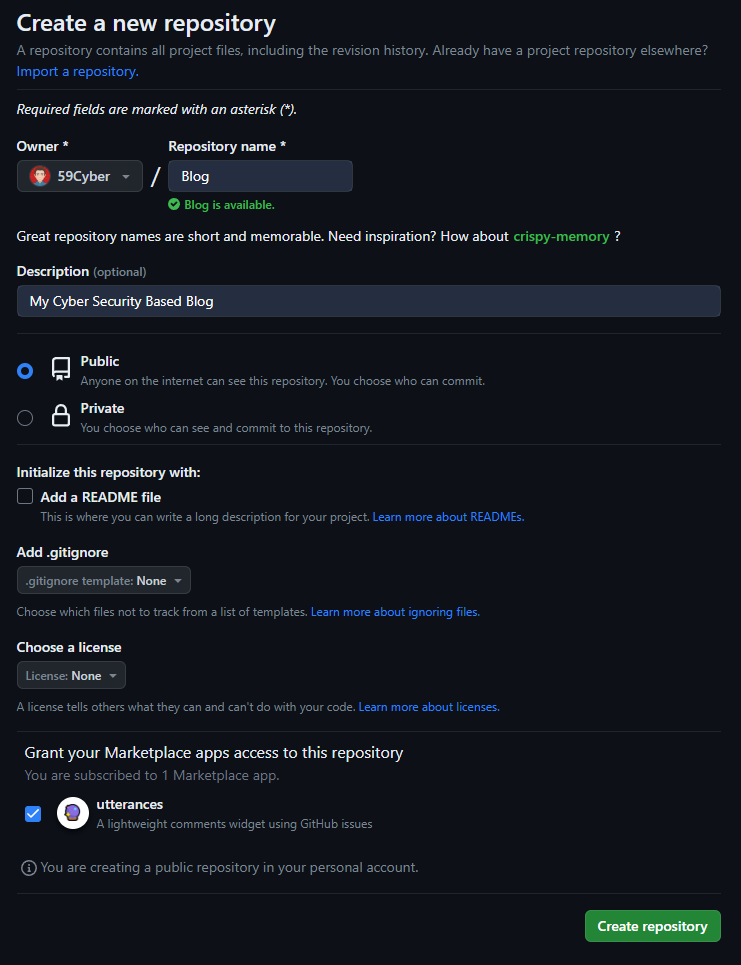
Once logged in, create Two Repositories:
-
Repository 1: Name it as you wish; this will be the storage for all your code. Ensure that this repository is marked as Private to safeguard your website code from unauthorized access. In my case, I named it CyberWebsite.
-
Repository 2: Give it a more meaningful name, reflecting the purpose of your website. If, like me, you’re creating a blog, name it accordingly. This name will be part of your website URL (e.g.,
https://59cyber.github.io/Blog/). Make sure this repository is marked as Public as this is the repository that GitHub will access to render your site to people.
Cloning Your GitHub Repositories
Now, let’s bring the repositories you created on GitHub to your local device. Follow these steps:
-
Create a Main Folder:
- Before proceeding, establish a central folder where all aspects of your site will be stored.
-
Navigate and Clone Repositories:
- Using the terminal, navigate to your designated folder.
- Clone both repositories using the following Git command:
1
2
git clone https://github.com/YOUR_USERNAME/YOUR_PUBLIC_REPOSITORY_NAME.git git clone https://github.com/YOUR_USERNAME/YOUR_PRIVATE__REPOSITORY_NAME.git -
1 Handling Private Repository Authentication:
For the private repository, you’ll need to authenticate yourself during cloning. Upon executing the clone, you’ll be prompted for your username and password.

Use your GitHub username as usual, but your password will be replaced with an access token.
Generate Access Token:
- To obtain the access token, navigate to your GitHub profile, then go to Settings > Developer settings > Personal Access Tokens > Tokens (Classic).
- Generate a new token by entering a note and selecting the main box for repo access. Press “Generate” at the bottom. A string of characters will be generated. This is your access token.
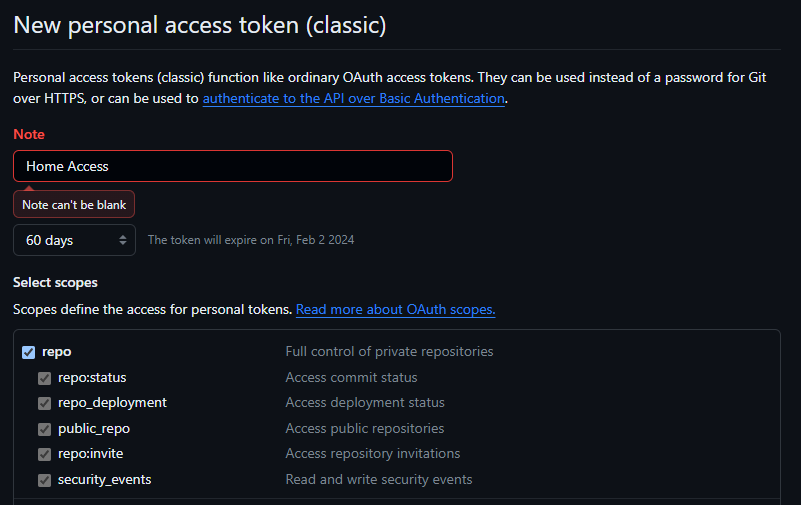
- Finally, enter the access token as your password in the terminal to clone the private repository.
That’s it for now! You’ve successfully cloned both the public and private repositories to your local environment.
Installing and Generating Your Hugo Site
Now that GitHub is ready, let’s create the website with Hugo. In this step, we’ll create the fundamental structure for the site.
-
Intall Hugo
- Install Hugo using the following command:
1sudo apt install hugo
Or vist Hugo’s offical website to download the latest version for your OS.
-
Generating a Basic Site
- With Hugo installed, you can now generate your basic site. Navigate to your local private repository through the terminal.
- Run the following command that will will create essential files for your website structure:
1hugo new site . --force
You should see some new files appear in the folder and this is the Website! But… we don’t have anything to show yet…
Installing a Theme
Choosing a theme is a pivotal step in crafting the look and feel of your website. Follow these instructions to seamlessly integrate a theme into your Hugo-powered site:
-
Selecting a Theme
- Visit Hugo Themes and pick a theme that aligns with your preferences. This site was built using Stack, but the installation process is similar for all themes.
-
Download and Place the Theme
- Download or use Git to pull the theme repository into the “themes” folder within your project directory.
-
Configuring the Theme
- Navigate into the theme folder and find the “exampleSite” folder. Within this folder, find the theme’s configuration file (e.g., .yaml for the Stack theme).
- Copy the configuration file and paste it into your main project folder, overwriting any existing “config” file.
-
Run the Site
- In the terminal, navigate to your project directory and run:
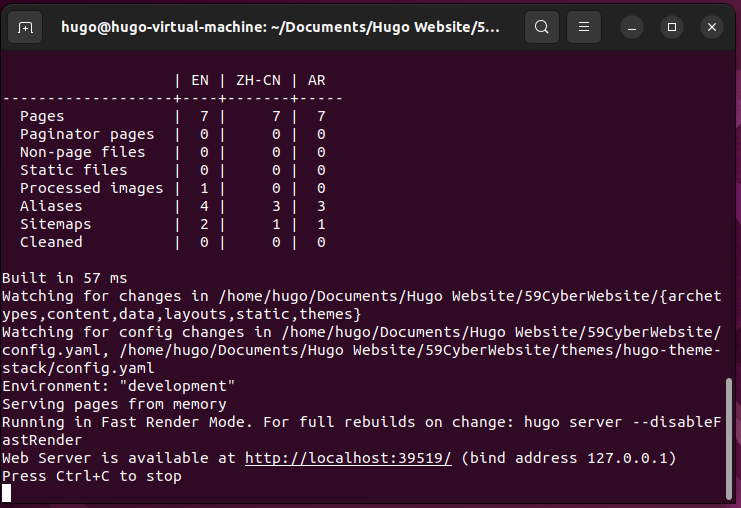
1hugo server
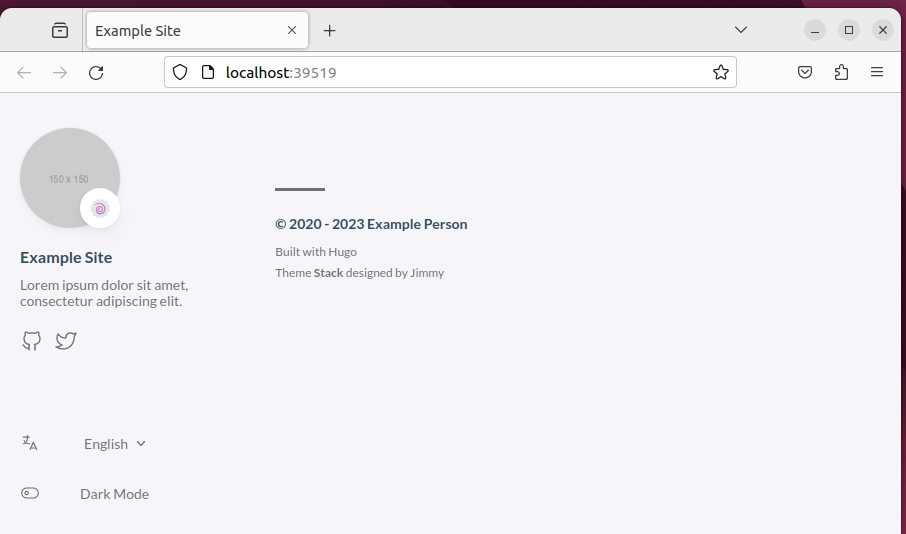
If successful, you’ll receive a local IP address. Open your web browser and navigate to this address to preview your website.
If the server failed to start because the theme could not be found, open the “config” file in the main folder and ensure that the theme name is the exact same as the theme folder.
Updating the “baseurl”
To ensure your website links correctly to your public GitHub repository, you need to make a quick adjustment in the configuration. Follow these steps:
-
Locate and open the “config” file in your project folder.
-
Within the file, find the “baseurl” variable. By default, it might be set to
https://example.com. -
Change the “baseurl” value to your GitHub public repository URL:
1https://github.com/YOUR_USERNAME/YOUR_PUBLIC_REPOSITORY_NAME.git -
Save the changes to the file.
Now, your website is configured to link seamlessly with your public GitHub repository.
Creating Your First Post
Now, let’s dive into the exciting part—creating your first post. Follow these straightforward steps to get started:
-
Utilize Example Content
- Go to the “exampleSite” folder within your chosen theme.
- Copy the categories, page, and post from the “Content” directory.
- Paste the copied content into the “content” folder in the main area of your site.
- Navigate to your project directory in the terminal and run:
1hugo server
By doing this, you should see the example pages and posts when you open your site.

- Customize Your Post
- Navigate into the “posts” folder, open an existing post, and modify its contents to suit your preferences.
- If you’re new to Markdown, refer to the Markdown Syntax guide for guidance on formatting.
- Place any images you use in the same folder as the post’s Markdown file.
With these steps, you’ve successfully added content to your website. You can now create as many posts to your heart’s content!
Publishing Your Website
Your website is ready, and now it’s time to share it with the world. Follow these steps to publish it on GitHub:
-
Build and Apply Changes
- Enter your main website folder and run:
1hugo -t YOUR_THEME # e.g., hugo-theme-stack- This command builds your website, applying any changes without running it locally.
-
Push to Private Repository
- Push the entire website to your private repository using the following commands:
1git add . && git commit -m "Meaningful comment" && git push origin main- You may be asked to provide your username and email when trying to push. You can add them by using the following commands:
1
2
git config --global user.email "you@example.com" git config --global user.name "Your Name"(Your password is the token generated earlier)
-
Move to Public Repository
- Inside the main website folder, locate the “public” folder. This contains the public version of your site.
- Copy the contents of the public folder to the “Blog” folder pulled from GitHub:
1cp -r public/. ../Blog- Next navigate to the public “Blog” folder and push it to GitHub:
1git add . && git commit -m "Meaningful comment" && git push origin main
Now, your website is publicly accessible on GitHub for everyone to see!
Making Your Site Live
Congratulations! Your website is ready for the world to see. Follow these final steps to officially host your site on GitHub:
-
Configure GitHub Pages
- Open your public repository, click on “Settings” at the top, and then select “Pages” from the left panel.
- Confirm that the source is set to “Deploy from a branch” with the branch set to “Main” and folder set to “Root.” Save your settings.
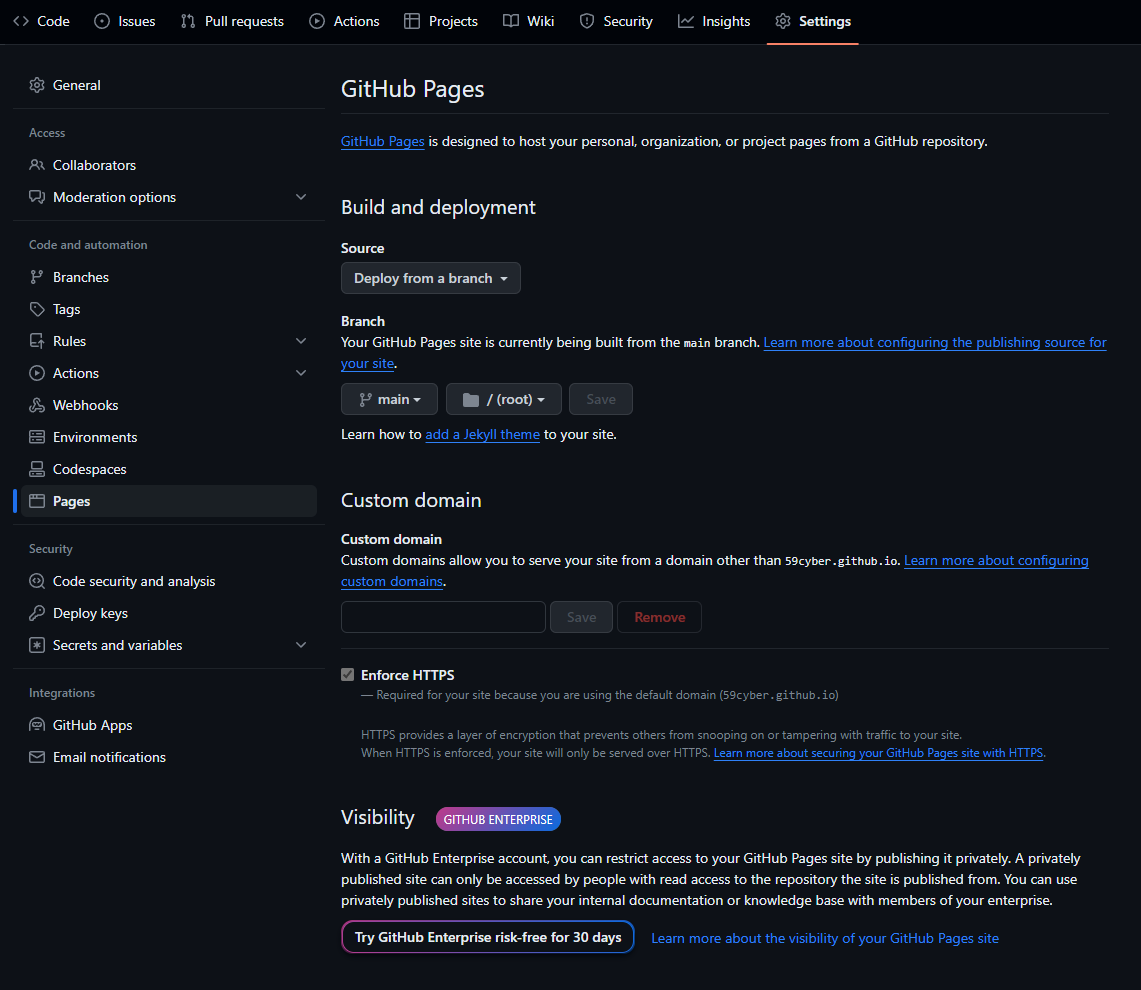
- Navigate to the “Actions” tab at the top of the page.
- Select “pages build and deployment.” This process may take a moment, but once completed, you’ll find the link to your live site!
For the first build, GitHub might take some time to properly render your site. Initially, it may look incomplete, but give it a moment to finalize.
Now, your website is live and accessible to anyone with the link! Share it proudly.
Summary
Congratulations on successfully creating and launching your website using Hugo and GitHub! In this guide, we navigated through GitHub setup, theme installation, content creation, and the final steps to make your site live. Whether it’s a personal blog, portfolio, or any other project, you’ve now empowered yourself to share your work with the world